
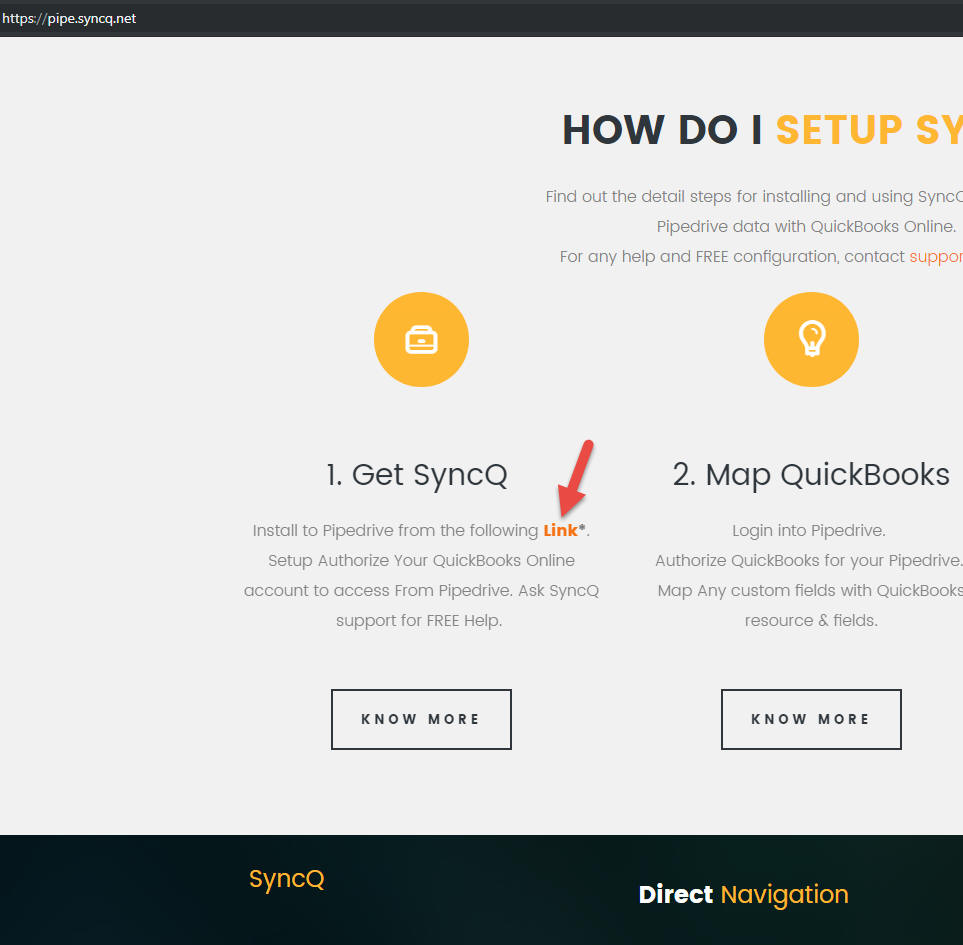
1. Install SyncQ in Pipedrive
1.1 Install/upgrade SyncQ app to your
Pipedrive account: Install the latest release of SyncQ from
pipe.syncq.net GetSyncQ section. Alternately
find SyncQ Pipedrive from Intuit or Pipedrive app store.
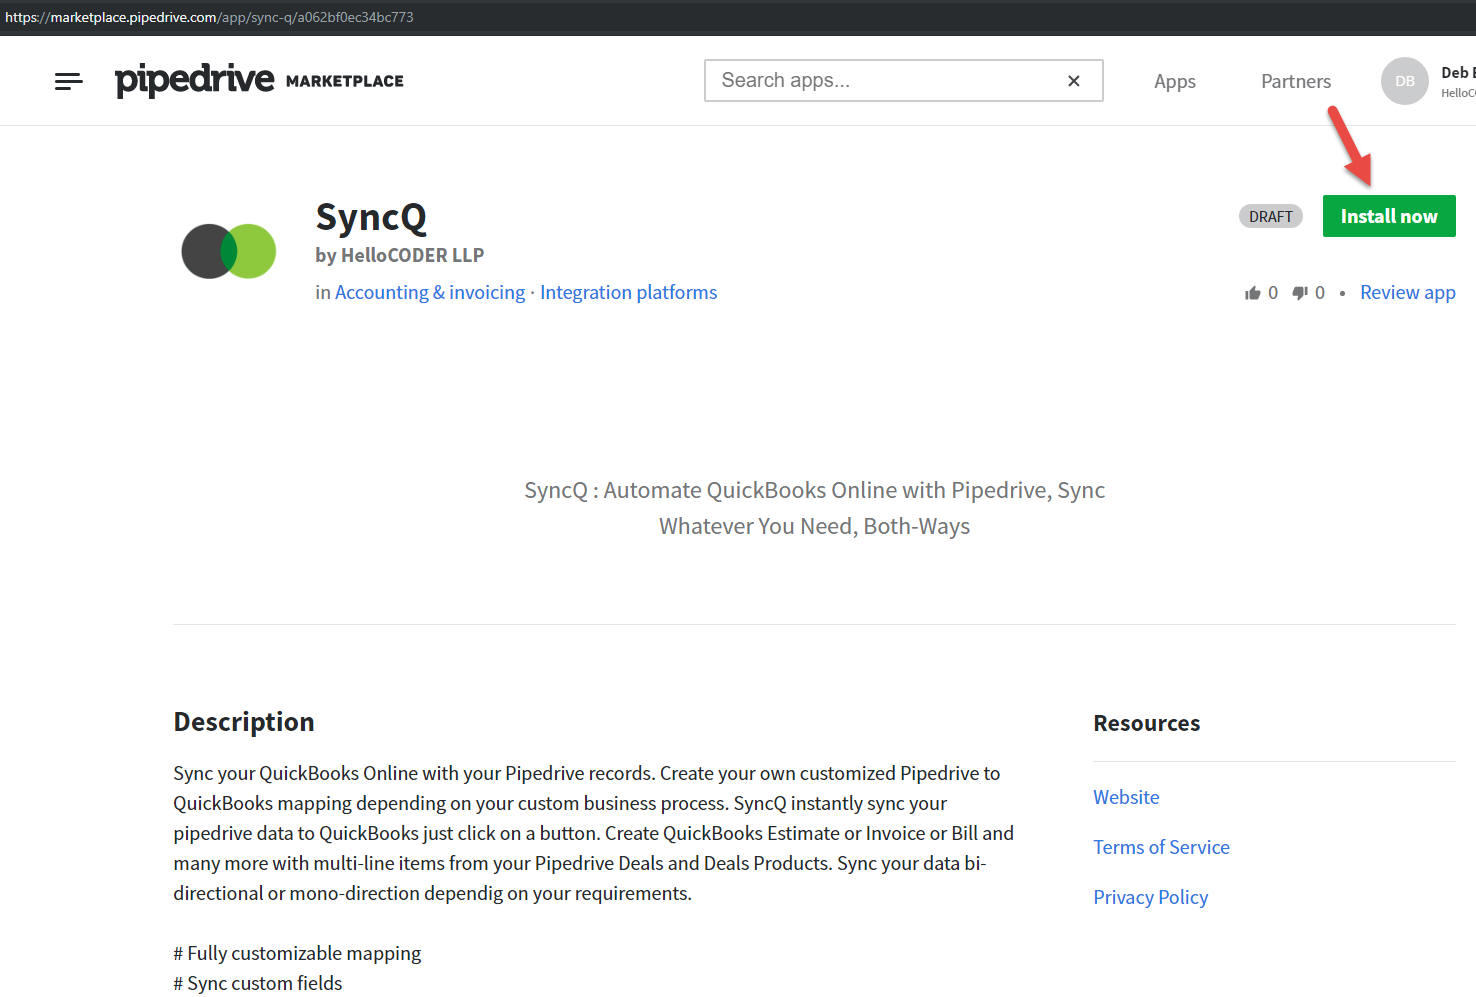
1.2 After
installation of SyncQ, you will be automatically
redirected to SyncQ Home page for further configuration.
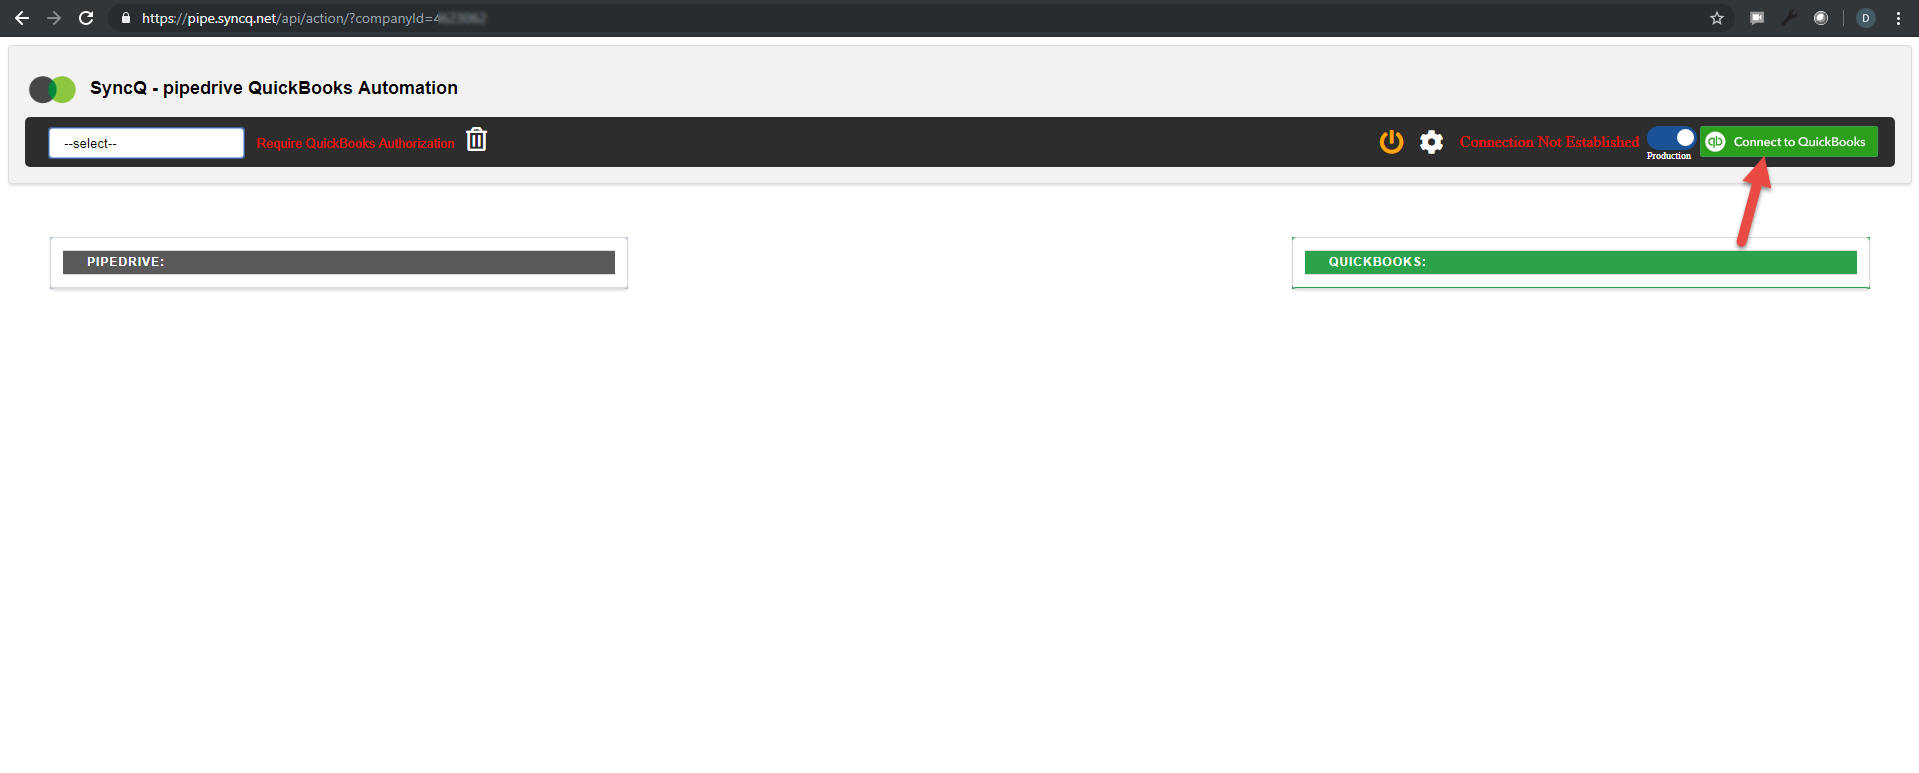
2. Connect and Authorize Your QuickBooks
Online
From SyncQ App page:
2.1 Click
Connect to QuickBooks button
2.2 Fill up as follows:
2.1 Click on "Connect to QuickBooks"
green button
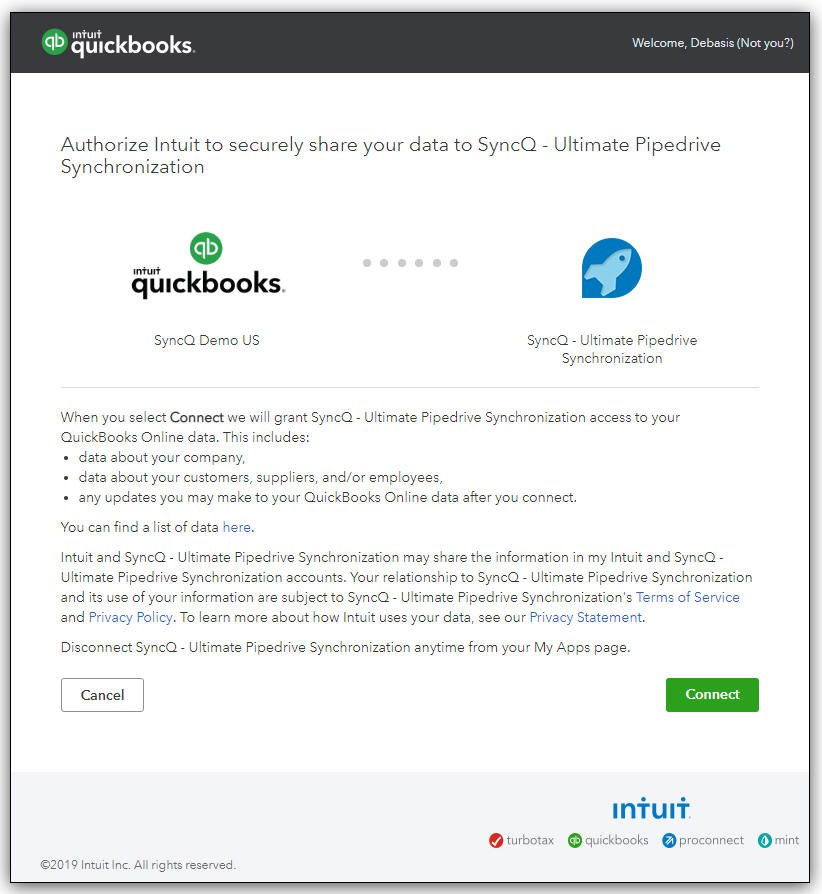
2.2 This will open up a new tab, redirecting to QuickBooks app login page (https://appcenter.intuit.com/)
2.3 Login and authorize your intended QuickBooks Online company
2.4 Click Authorize
2.5 After authorization, you will
be redirected to SyncQ app page
2.6 Your QuickBooks company will be automatically added in the drop down. Now, select QuickBooks
company in the component dropdown. If everything working correctly, you will get
QuickBooks company name in green color next right to the company drop down. (If not authorized or incorrect company selected, a message will appear as "Require QuickBooks Authorization")
2.7 If you see your company name in Green, the green button will be replaced by a red button "Disconnect QuickBooks".
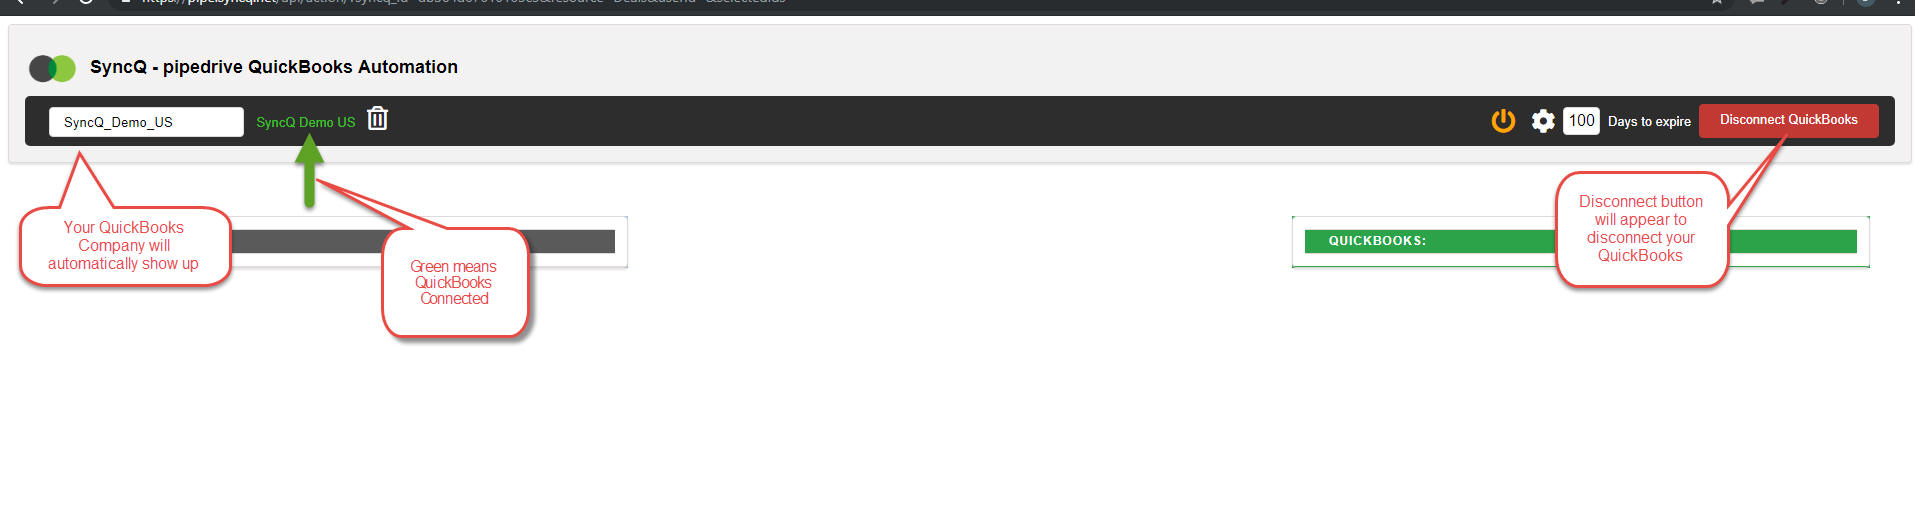
Congrats! We are good to start linking your QucikBooks
with Pipedrive.
3. Update Resource and Field Mappings
3.1 After you authorize your QuickBooks Online company, a default configuration is automatically added based on popular choices.
3.2 By default following mapping are automatically added.
| Pipedrive | QuickBooks |
| People | Customer |
| Products | Item |
| Deals | Estimate |
3.3 If you have different requirements
as per your business requirement, you update these
mapping.
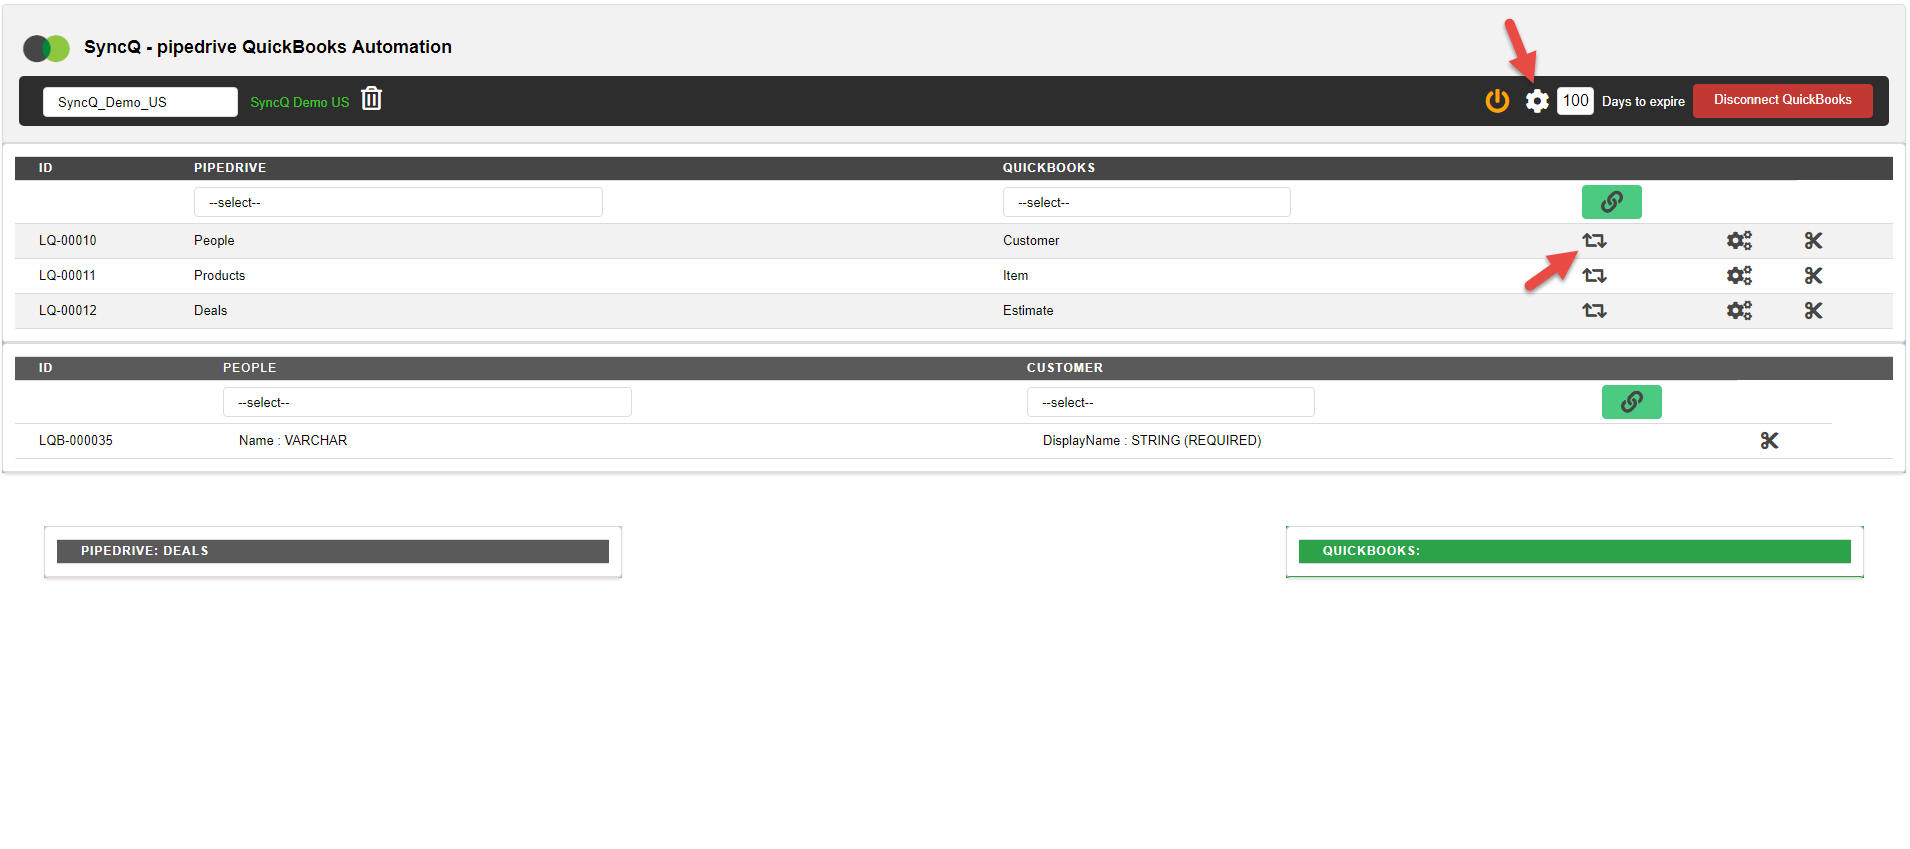
3.4 To update mapping, click on the setup
wheel icon
Sample Configuration and sync process
SyncQ Sample Configuration:
1. Select your QucikBooks
company in the SyncQ app page and
click on the setup Wheel icon
2. It will show two columns, one
Pipedrive, another QuickBooks, followed by a Green Link Button
3. Select the desired
Pipedrive resource that you want to sync to QuickBooks
In this example, we will map
Pipedrive People with QuickBooks Customer resource
4. Select
People in the Pipedrive drop down, Select Customer in QuickBooks dropdown, and then click the Link button on right
5. A new row will add up starting with ID as LQ-xxx.
6. This has created a mapping at
Pipedrive resource to QuickBooks resource level, next we will define field mappings
7. Click on the Field Mappings icon (two circled arrow icon), it will add up a new row,
showing
Pipedrive resource fields and QuickBooks resource fields
8. Map the desired fields as required (for proper synching, correct field mapping required, ask SyncQ for any help)
In this example, we will map,
People Name from Pipedrive to DisplayName
from QuickBooks Customer resource
On success, it will add a new row starting with ID LQB-xxxx
9. We are now ready to Synch records from
Pipedrive to QuickBooks
10. Goto a record page of
Pipedrive Account
11. Goto a people record in
Pipedrive
12. There is a three dot button on the upper
right area of the details page
13. Click on that,
you should see SyncQ button
14. Click on this button,
it will open up SyncQ app page in a new browser tab
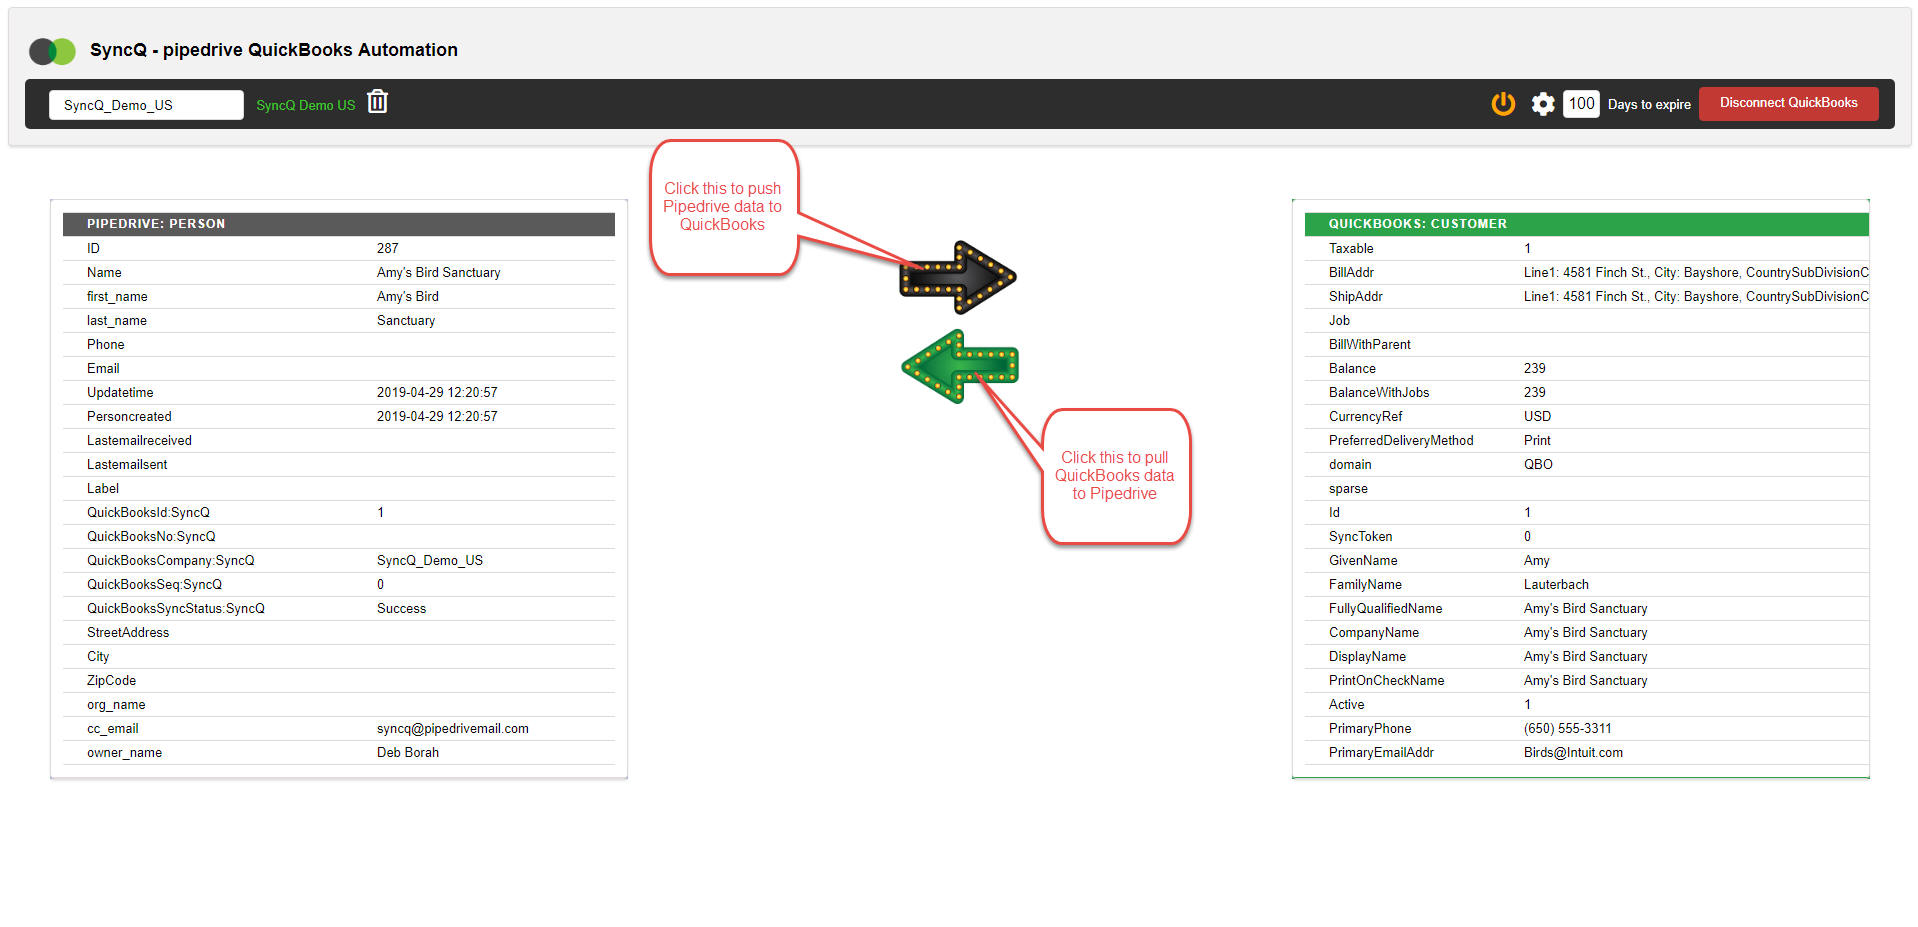
showing details of the Pipedrive record. It also tries
to auto find QuickBooks records if a match found.
15. Click Black Right Arrow button to push Pipedrive
data to your QuickBooks Online. Similarly, Green Left
Arrow Button will sync your QuickBooks data to Pipedrive
If everything working fine, you will see a QuickBooks Id automatically updated in your Pipedrive record:
FOR MULTI-COMPANY CONFIGURATION, QuickBooks COMPANY SELECTION IS MUST, OTHERWISE SYNC WILL FAIL, IN A SINGLE COMPANY SETUP, IT IS NOT MANDATORY

© Hellocoder 2019 All Rights Reserved